Basic Info About the SG-90 / SG90 Servo
A standard servo typically consists of a small electric motor, a potentiometer,
controller, and gears. The position of the output shaft is constantly
measured by the internal potentiometer and compared with the position set by the Arduino.
If there is any difference between the two values, the motor is moved so that both the values are balanced. They also happen to be high torque motors.
The Circuit for SG-90 / SG90 Servo motor with an Arduino
Connect the 5V pin of the servo to the 5V pin of the Arduino Uno. This will act as the power supply for the module.
Connect the GND pin of the serve to the GND pin of the Arduino Uno.
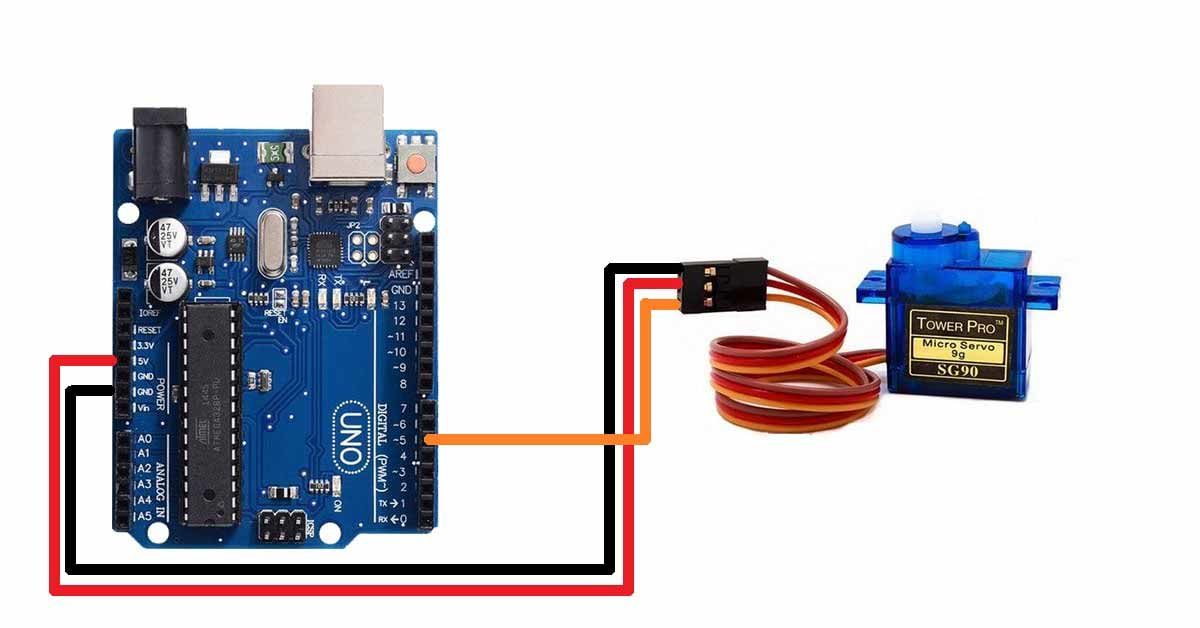
Connect the Signal (SIG) Pin of the module to digital pin 5 of the Arduino Uno.
PWM Pins on the Arduino
This pin is a PWM pin. A PWN pin is marked by “~”. A PWM pin is a digital pin that is capable of pulse width modulation. Basically, you have a higher degree of control if you use a PWM pin over other pins. Digital Pins 3,5,6,9,10,11 are PWM pins. If your 5th pin is not free make sure you attach the SG 90 servo in any of the pins listed above otherwise it might lead to malfunctioning.
All the signals that we send to the servo in order to control it will be through the pin 5 of the Arduino.
Code for SG-90 / SG90 Servo Motor with an Arduino
#include <Servo.h> //Imports the library Servo

Servo servo; //Defines the object Servo of type(class) Servo
int angle = 10; // Defines an integer

void setup() {
  servo.attach(5); // States that the servo is attached to pin 5
  servo.write(angle); //Sets the servo angle to 10degrees
}


void loop() {


// The following for loop runs till the servo is turned till 180degrees
  for(angle = 10; angle < 180; angle++) {
    servo.write(angle);
    delay(15);
  }

//The following for loop goes back till servo is turned till 10degrees
  for(angle = 180; angle > 10; angle--){
    servo.write(angle);
    delay(15);
  }
}
If your SG90 servo is not working, you might try to power it with an external power supply as the Arduino Uno might not be able to serve that current requirement. Usually connecting one servo is not a problem, but if it is you can try fixing it using the method discussed above.
We hope we have helped you in knowing more about the SG90 servo but still if you may need any help regarding the SG90 servo, you can mail us at ideas@botuniverse.in
To order the SG90 servo now, click here
Leave a Reply
You must be logged in to post a comment.
If you have any question regarding the SG-90 Servo motor or any suggestions regarding this post, you can mail us at ideas@botuniverse.in